Affiliate links on Android Authority may earn us a commission. Learn more.
How to create a VR app for Android in just 7 minutes
It might not have caught on in the massive way that everyone has been anticipating it will do just yet, but virtual reality is still definitely going to play a huge role in the future of tech and the future of Android. VR has almost limitless potential to change the world – whether that means influencing the way we create, communicate, learn, or game. And as our mobile devices get more powerful, and computer vision allows for true inside-out tracking, much of this is likely to take place on our Android phones.
Read Next: Poly API: Retrieving 3D assets for your VR and AR Android apps
But for now, we have Google Cardboard. And Daydream. And the Gear VR. They’re a little less exciting than your Oculus Rifts and HTCVives, sure, but there are still some pretty awesome games and apps here. There are also lots of great reasons for developers to get involved: not only because there’s a lot of money to be made in the fledgling VR app stores, but also because it pays to get ahead of the curve and learn the skills that are likely to be in huge demand in the next few years.
And apart from anything else, it’s just incredibly awesome to be able to create your own virtual world and then step into it.
And what might come as a surprise, is just how easy it is to get started with your first app for Google Cardboard or Daydream! In fact, you can create your first VR app for Android in Unity in just 7 minutes or less!
Creating the world
If you’re a total newcomer to Unity, be sure to read our primer on Unity 3D before proceeding.
The first thing we need to do is to create a 3D environment that we can use to test our VR application.
Doing this is thankfully very simple. First: start a new project and make sure you tick the box to make it a 3D project.
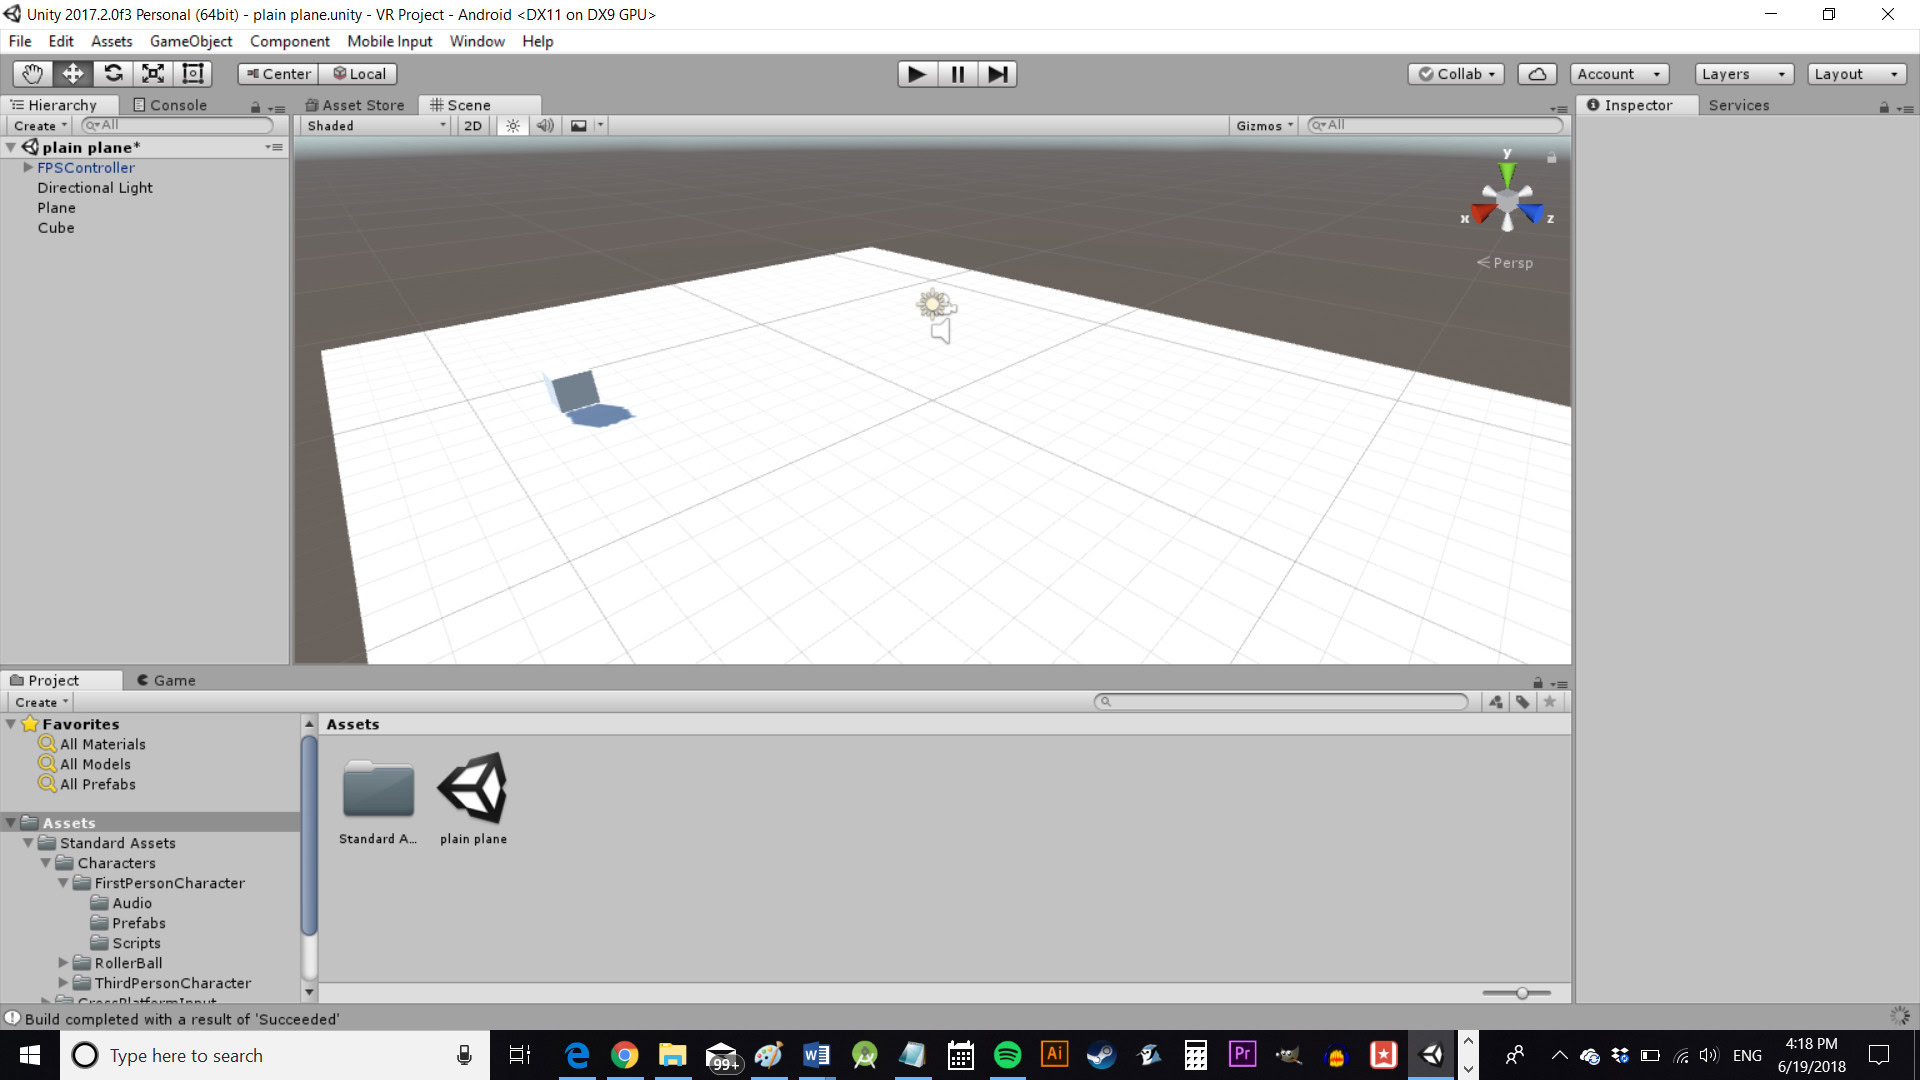
Now, once in the editor, choose GameObject > 3D Object > Plane. This will insert a flat plane (what did you expect?) into the scene. You can drag it around, make it larger, and do whatever else you like with it from there.
We can also add a cube or something to our scene if we like, by doing the same thing again but selecting ‘cube’. This will give us something to look at as we’re navigating our way around the space.
If you’re not all that familiar with the Unity interface or creating 3D games and you want to learn more, then you can find a full tutorial on creating a 3D shooter for Android here.
Now we have a 3D world but no way to move around in it. To fix this, you’re going to head down to the Assets folder in the Project window at the bottom of the screen. Right-click on that Assets folder, and then choose Import Package > Characters.
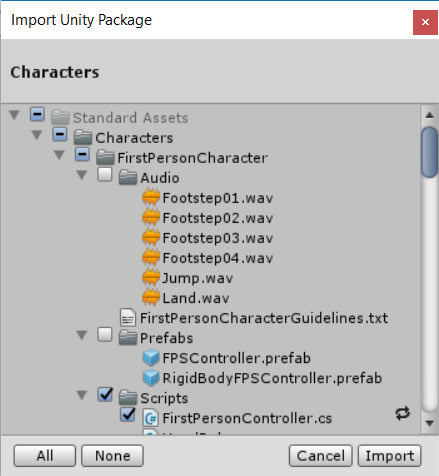
A window will come up giving you the option to select which specific aspects of this package you need. It might be easier at this point just to leave them all ticked – though in future you can be more selective to keep file sizes down.
Once that import process is done – it might take a few seconds – navigate through the hierarchy to Standard Assets > Characters > FirstPersonCharacter > Prefabs. A prefab in Unity is a GameObject that might consist of scripts, 3D models, and more – all prefabricated (hence the name) and ready to use. This one is called FPSController. You’re going to drag that from this folder into your scene, in order to place the FPS character in the game.
Now delete the Main Camera object from your scene as that’s no longer needed. The easiest way to do this is to select it in the Hierarchy and then just hit ‘delete’.
Hit play at this point and you’ll find you have the bare bones for a basic first-person shooter game. You can move around the scene with a combination of the WASD keys and the mouse, you can jump with the space bar, and everything works as you would expect. Pretty amazing for a couple of minutes of work!
Going in…
Now the world is ready for us, it’s time to take the red pill and dive in!
To do that, you’re going to need to set up the project and your game ready for testing. If you set up Unity properly then this should be relatively easy.
First, save your scene. This is the level you’ve created (which in Unity includes the character controller). Just hitting control + S will do the trick, though you can also add a ‘Scenes’ folder to your project if you’d like to keep things neat. I called mine ‘plaine plane’. Because reasons.
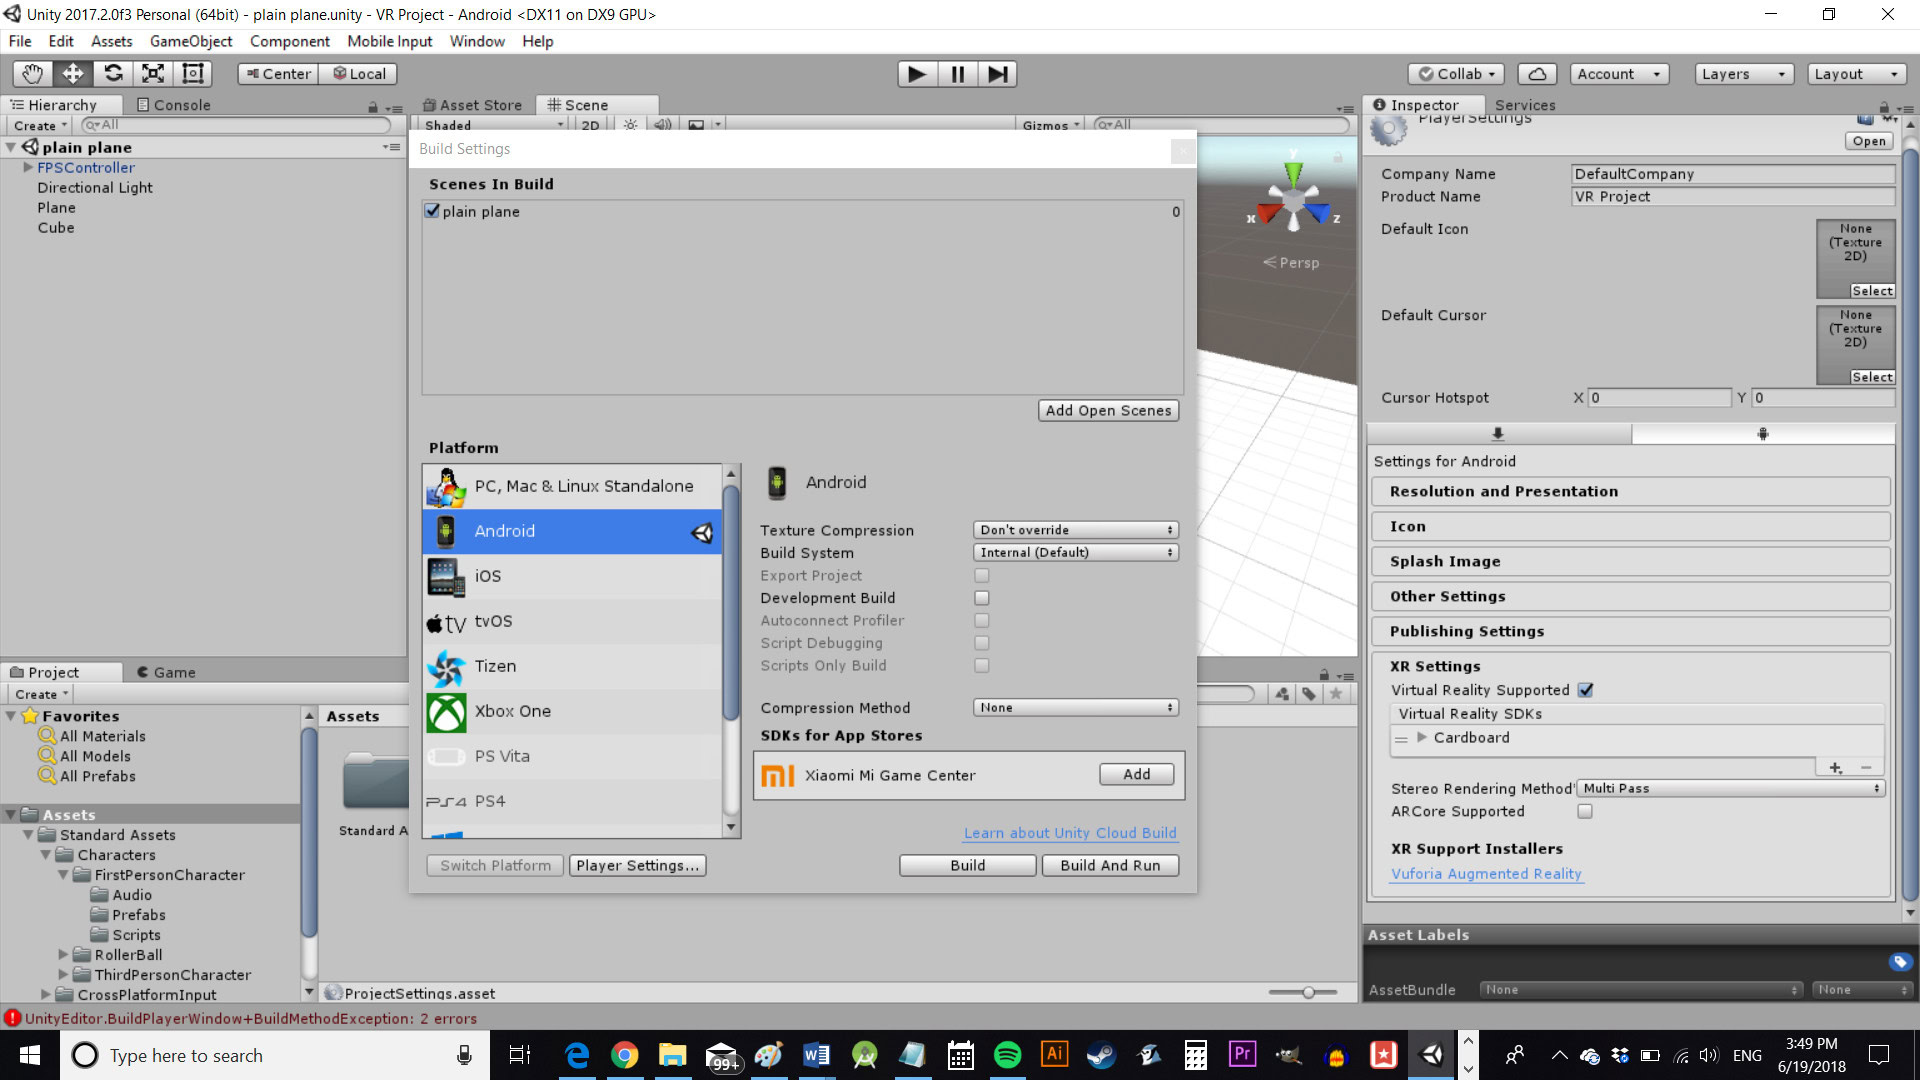
Either way, the next step is to go to File > Build Settings. Select Android as the platform and click ‘Switch Platform’ to make it official. Give it a couple seconds to do stuff.
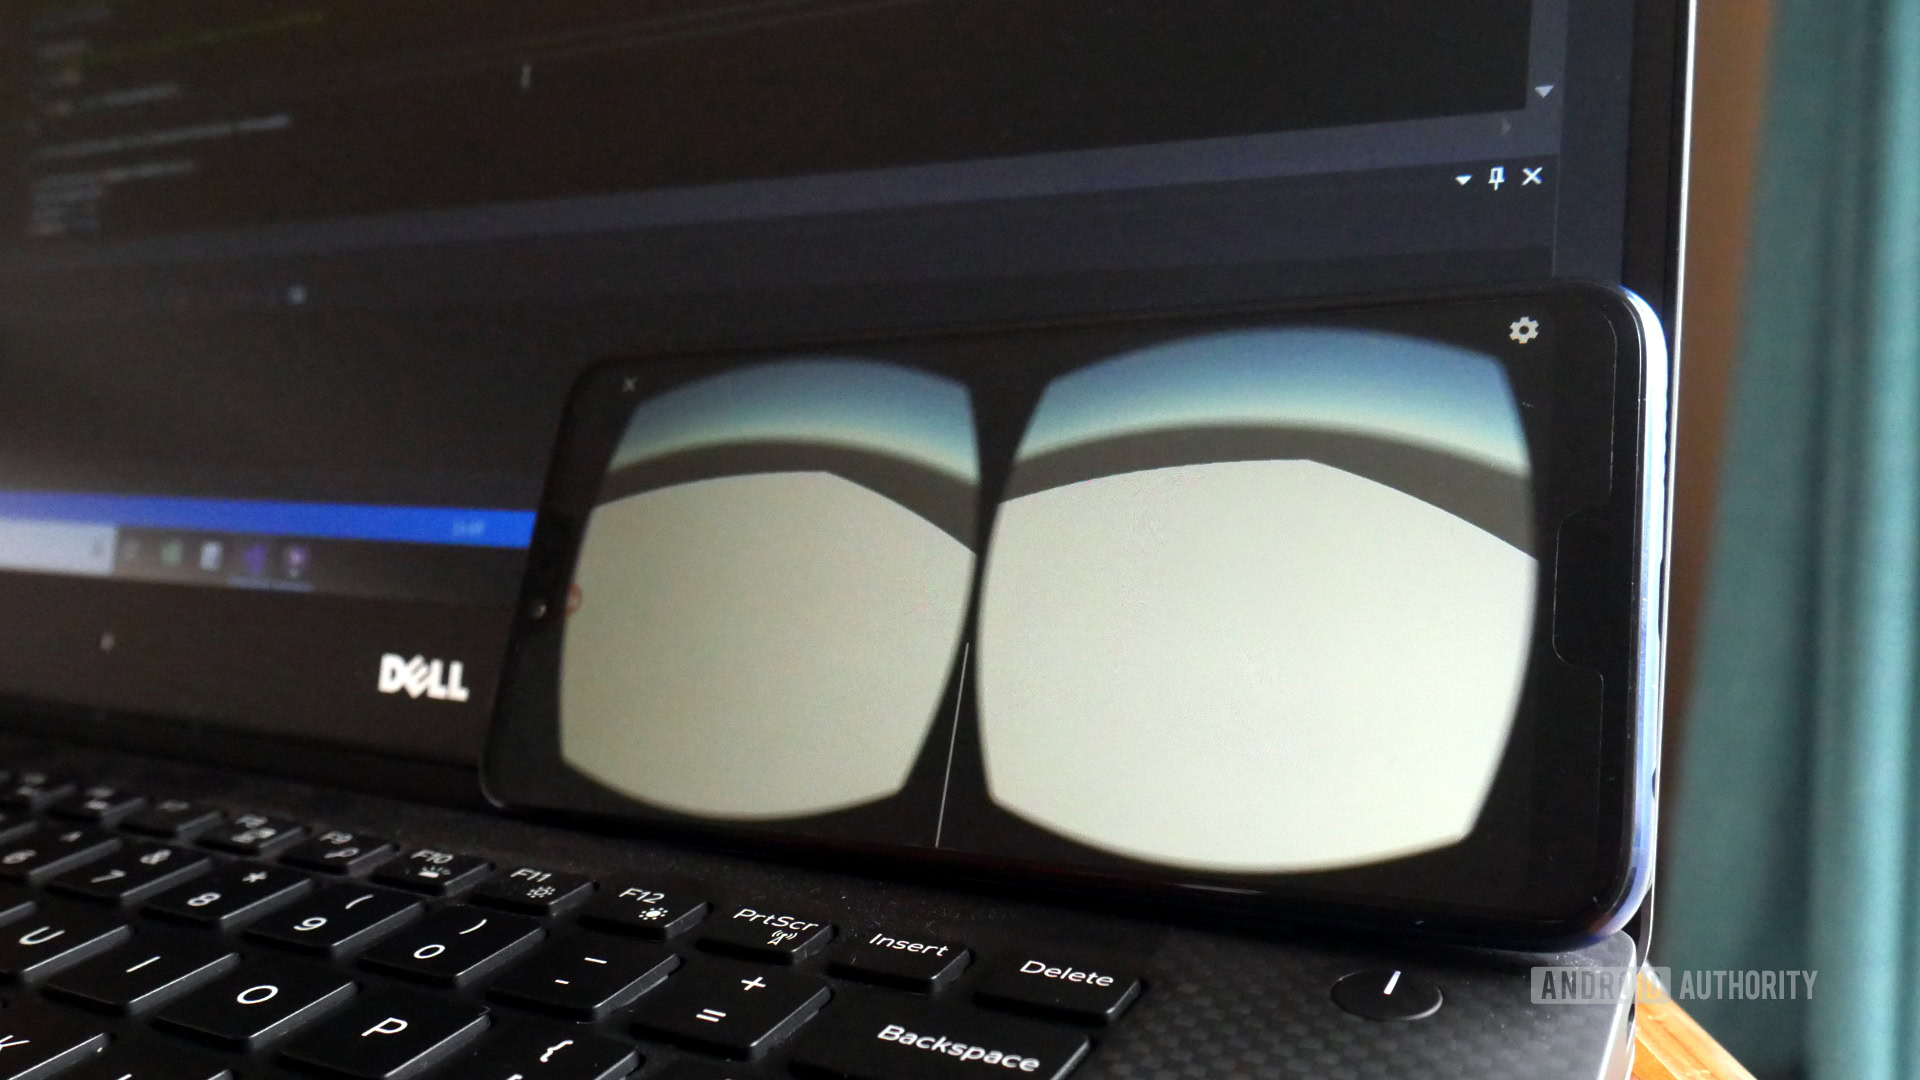
Now click Player Settings and you’ll find some new options open up in the Inspector on the right side of the screen. Change the Minimum API Level to Android 4.4 Kit Kat (API Level 19) as this is required for Android Cardboard support.
Under Other Settings, set the package name to be “com.yourcompanyname.yourappname”. This is strict in Unity.
Then head down to the XR Settings section and click ‘Virtual Reality Supported’ then add the Virtual Reality SDK (just click the plus button then select it from the drop-down list).
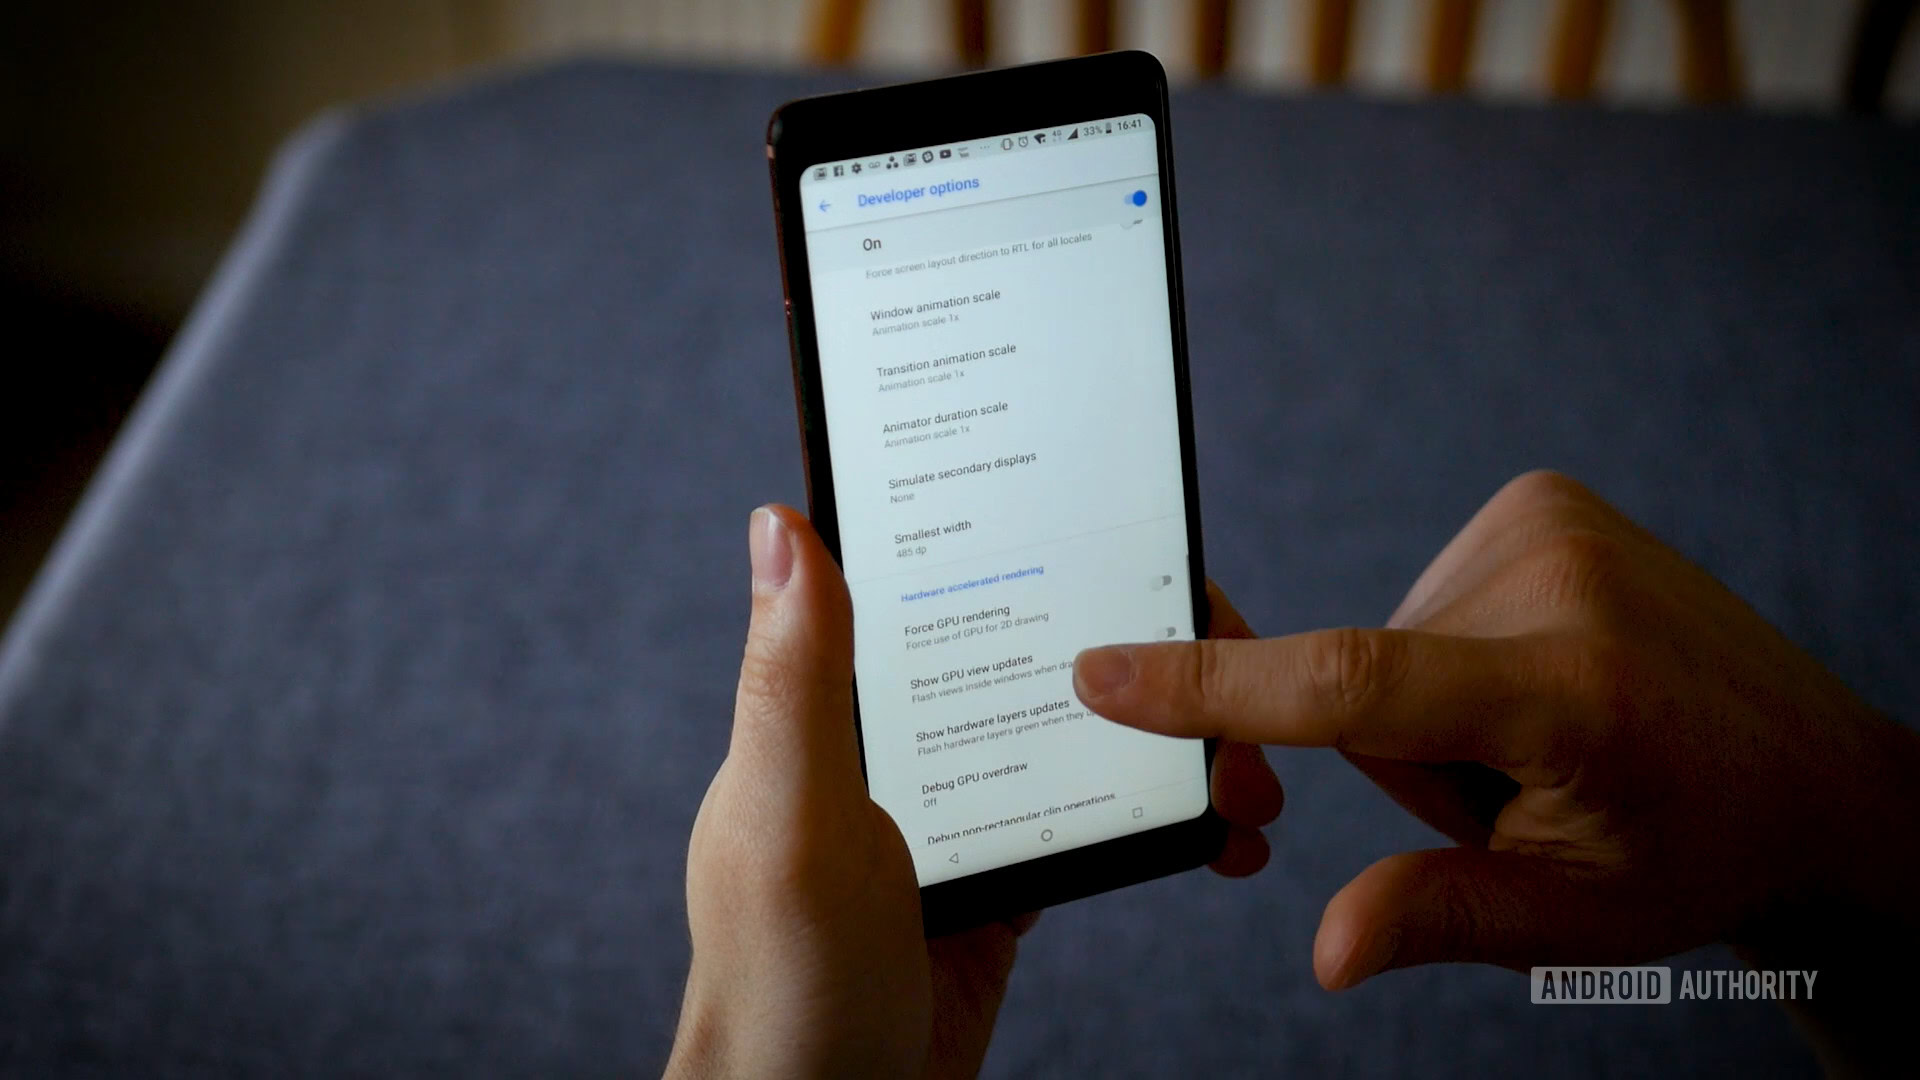
Now before you can test this, you first need to enable USB Debugging on your device. This will let you test apps and programs that you develop in Unity and Android Studio, and you can find the option in the Developer Options. If you don’t have this section in your settings, then just go to System > About Phone and then tap the Build Number seven times. If successful, it should say ‘You Are Now a Developer’. If that doesn’t happen, you may need to Google how to enable this on your device (a good place to start is here).
Click Build and Run and you’ll be prompted to choose a name for the APK – that being the package file that is used to install your app.
With all that done, you should find that your app installs, and you now have a 3D world that you can view in 3D. It really is that simple! And of course, if you wanted to do the same thing on Google Daydream, you’d just follow the exact same process but with the Daydream SDK. Things are a little more complicated on the Oculus as you’ll need a signature number from your device.
But other than that, it really is that simple!
Adding Input
Right now, you can look around, but there is no real interactivity. Google Cardboard only has one form of input, and fortunately for us, it’s very easy to implement.
Google Cardboard uses a single button for selecting menu items and interacting with game worlds. This is interpreted by Unity as a mouse click, which also happens to correspond with a screen tap. So anywhere that we use Input.GetMouseButtonDown(0) in our scripts, we will be able to accept input that way.
Choose the FPSController in the hierarchy, scroll down to the script, and then click the small settings icon in the top right and choose ‘Edit Script’.
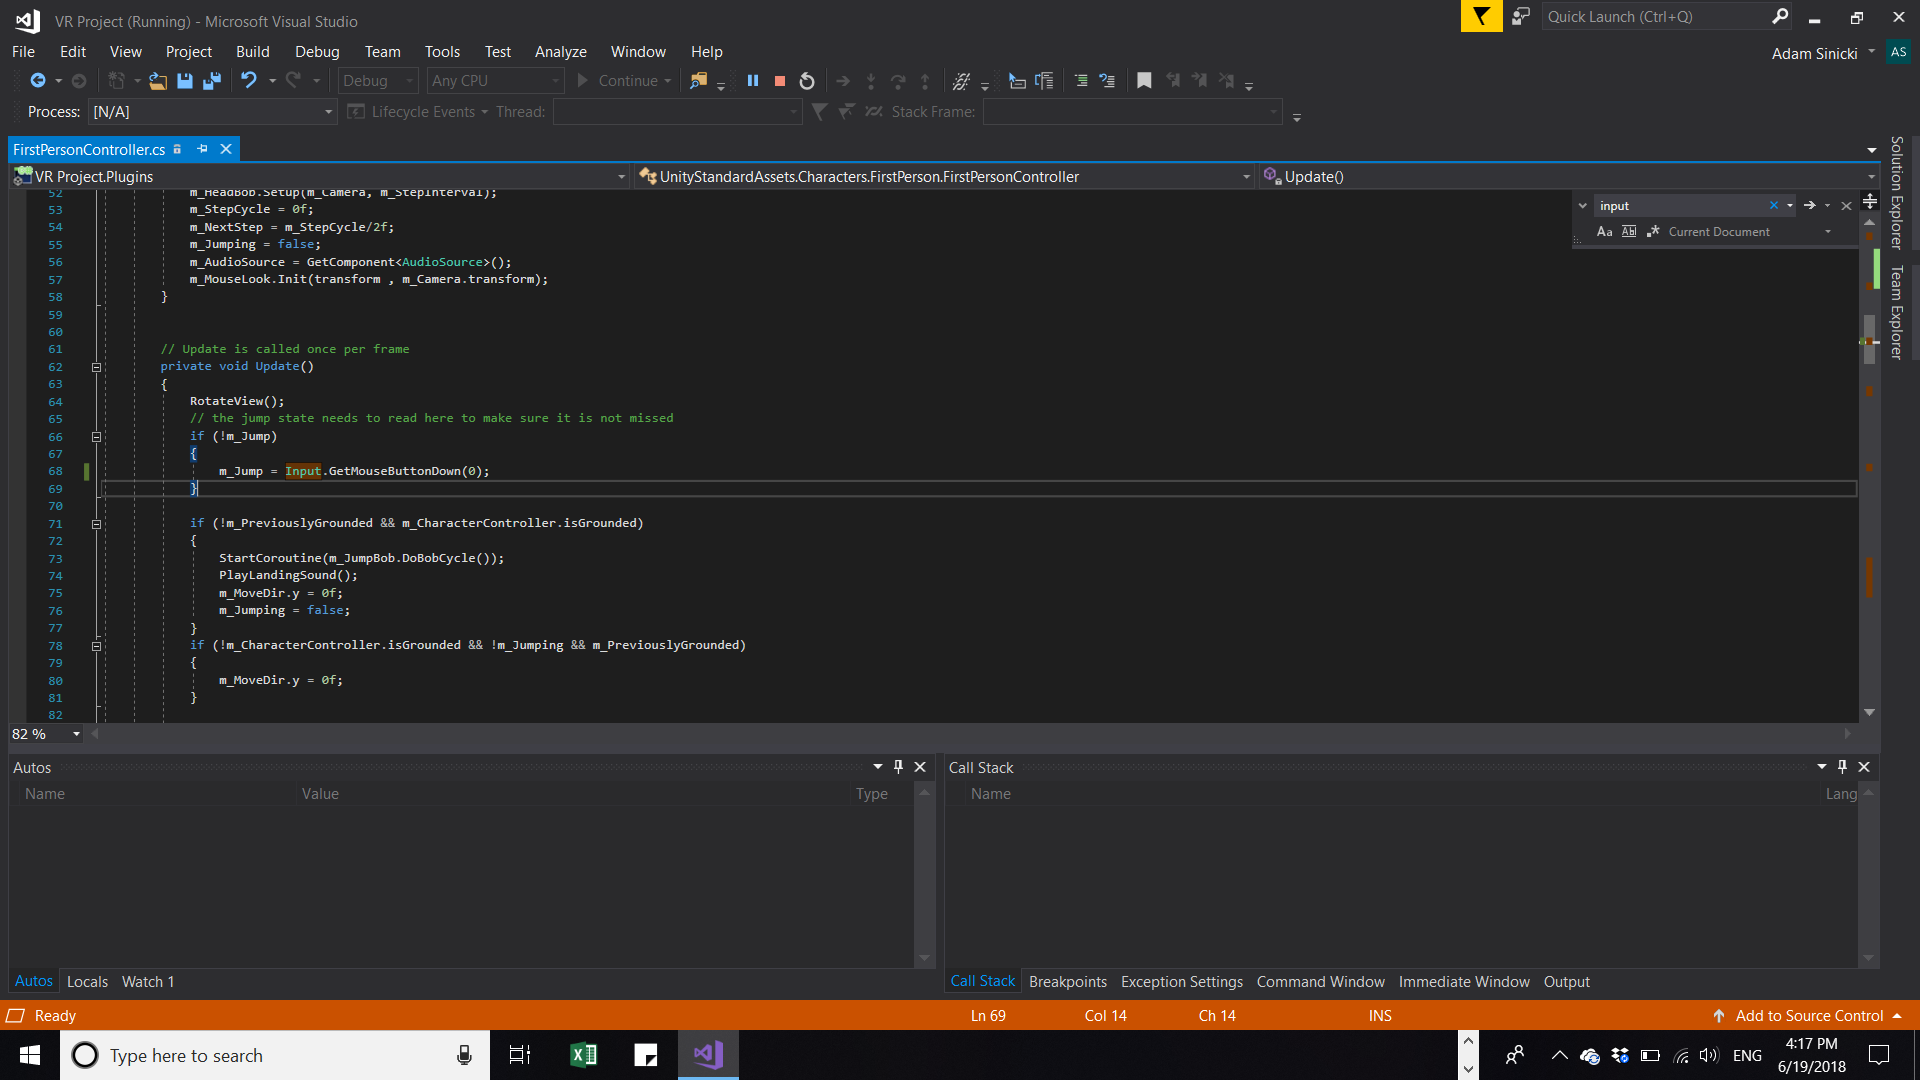
This will open up the C# script in VisualStudio and all you’re going to do is to find where it says:
m_Jump = CrossPlatformInputManager.GetButtonDown(“Jump”);and replace that with:
m_Jump = Input.GetMouseButtonDown(0);Now test the game again and you’ll find that tapping that button makes you jump!
Closing comments
If you wanted to, you could make the button walk the character forward, you could use it to fire projectiles at targets – there are countless options. VR offers a world of possibilities, many of which we haven’t dreamed up yet. Now you know how to get started with your own VR projects, all that’s standing between you and the next killer VR app is a little imagination. Check out this post for some ideas and tips for creating more immersive experiences to get you started.
Let us know how you get on and if you have any questions or run into any stumbling blocks, share them in the comments down below!